Pages

Friday 14 March 2014

Android: Custom Toast Messages.

In last tutorial we saw how to use Toast Messages, and now we will see how to customize Toast messages.
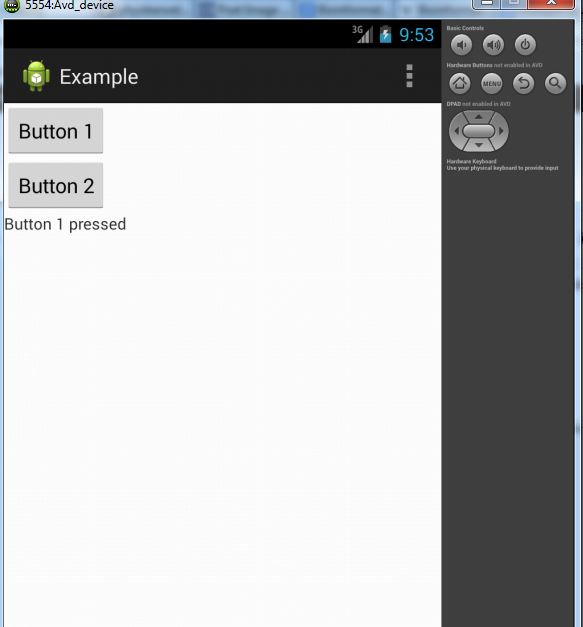
Output will be as:
Android Custom Toast

Xml file:
res/layout
1. activity_main.xml
 <LinearLayout xmlns:android="http://schemas.android.com/apk/res/android"  
   xmlns:tools="http://schemas.android.com/tools"  
   android:layout_width="match_parent"  
   android:layout_height="match_parent"  
   android:orientation="vertical"  
    >  
    <Button   
      android:id="@+id/button1"  
      android:layout_width="wrap_content"  
      android:layout_height="wrap_content"  
      android:text="Android Toast"  
      />  
   </LinearLayout>  
2. toast.xml
 <?xml version="1.0" encoding="utf-8"?>  
 <LinearLayout xmlns:android="http://schemas.android.com/apk/res/android"  
   android:id="@+id/toast_layout"  
   android:layout_width="match_parent"  
   android:layout_height="match_parent"  
   android:orientation="horizontal" >  
    <ImageView android:src="@drawable/rating_good"  
         android:layout_width="wrap_content"  
         android:layout_height="wrap_content"  
         />  
   <TextView android:id="@+id/tv1"  
        android:layout_width="wrap_content"  
        android:layout_height="wrap_content"  
        />  
 </LinearLayout>  
Here we have defined a layout for our custom Toast. Also don't forget to add an image in your drawable folder.(res/drawable).

Java file:
src/
 package com.example.toastexample;  
 import android.os.Bundle;  
 import android.app.Activity;  
 import android.view.LayoutInflater;  
 import android.view.View;  
 import android.view.View.OnClickListener;  
 import android.view.ViewGroup;  
 import android.widget.Button;  
 import android.widget.TextView;  
 import android.widget.Toast;  
 public class MainActivity extends Activity implements OnClickListener {  
      Button b1;  
      @Override  
      protected void onCreate(Bundle savedInstanceState) {  
           super.onCreate(savedInstanceState);  
           setContentView(R.layout.activity_main);  
           b1=(Button) findViewById(R.id.button1);  
           b1.setOnClickListener(this);  
      }  
      @Override  
      public void onClick(View v) {  
           // TODO Auto-generated method stub  
           switch(v.getId()){  
           case R.id.button1:  
                LayoutInflater inflater = getLayoutInflater();  
                View layout = inflater.inflate(R.layout.toast,  
                                (ViewGroup) findViewById(R.id.toast_layout));//referencing toast layout  
                TextView text1 = (TextView) layout.findViewById(R.id.tv1);  
                text1.setText("Well Done");  
                Toast toast = new Toast(getApplicationContext());  
                toast.setDuration(Toast.LENGTH_LONG);  
                toast.setView(layout);  
                toast.show();  
                break;  
           }  
      }  
 }  
Here we have referenced our custom toast layout(toast.xml) and added that layout on our toast message.

Android: Using Toast Messages.

Android Toast is a little message used to provide feedback to the user. Today in this tutorial we will see how to make use of these Toast messages.

Output will be as:
 
Android Toast Message


Xml file:
res/layout/
 <LinearLayout xmlns:android="http://schemas.android.com/apk/res/android"  
   xmlns:tools="http://schemas.android.com/tools"  
   android:layout_width="match_parent"  
   android:layout_height="match_parent"  
   android:orientation="vertical"  
    >  
    <Button   
      android:id="@+id/button1"  
      android:layout_width="wrap_content"  
      android:layout_height="wrap_content"  
      android:text="Android Toast"  
      />  
   </LinearLayout>  

Java file:
src/
 package com.example.toastexample;  
 import android.os.Bundle;  
 import android.app.Activity;  
 import android.view.Menu;  
 import android.view.View;  
 import android.view.View.OnClickListener;  
 import android.widget.Button;  
 import android.widget.Toast;  
 public class MainActivity extends Activity implements OnClickListener {  
      Button b1;  
      @Override  
      protected void onCreate(Bundle savedInstanceState) {  
           super.onCreate(savedInstanceState);  
           setContentView(R.layout.activity_main);  
           b1=(Button) findViewById(R.id.button1);  
           b1.setOnClickListener(this);  
      }  
      @Override  
      public void onClick(View v) {  
           // TODO Auto-generated method stub  
           switch(v.getId()){  
           case R.id.button1:  
                Toast.makeText(getApplicationContext(), "Android Toast Message", Toast.LENGTH_SHORT).show();  
                //Display Toast message  
                break;  
           }  
      }  
 }  
Here Toast.makeText() method is used to make a Toast message which takes Context, Message and the duration for which the toast is to be displayed. And then show() method is used to display the Toast Message.

Saturday 8 March 2014

Android:Styling Buttons

In this tutorial we will see how we can change the default appearance of a button. For this we need to customize three different states of button i.e. default state, pressed state and focused state.
Output will be as:(When button is pressed)


Xml files:
1. activity_main(res/layout):
 <LinearLayout xmlns:android="http://schemas.android.com/apk/res/android"  
   xmlns:tools="http://schemas.android.com/tools"  
   android:layout_width="match_parent"  
   android:layout_height="match_parent"  
       android:padding="10dp"  
       android:orientation="vertical"  
   >  
   <Button   
     android:id="@+id/button1"  
     android:layout_width="200dp"  
     android:layout_height="50dp"  
     android:background="@drawable/custom_button"  
     android:text="Button"  
     />  
   </LinearLayout>  
2. custom_button.xml(res/drawable):
Now here we need to create a new xml file(custom_button.xml) under res/drawable that will customize the three states of button.
 <?xml version="1.0" encoding="utf-8"?>  
 <selector xmlns:android="http://schemas.android.com/apk/res/android" >  
   <item android:state_pressed="true"   
     android:drawable="@color/change"  
     >  
    </item>  
   <item android:state_focused="true"  
     android:drawable="@color/change"  
     >  
    </item>   
   <item android:drawable="@color/default_color">  
    </item>  
 </selector>  
3. colors.xml(res/values):
We also need to create colors.xml under res/values to define the colors.
 <?xml version="1.0" encoding="utf-8"?>  
 <resources>  
   <color name="change">#5F9EA0</color>  
   <color name="default_color">#ACACAC</color>  
 </resources>  

Thursday 6 March 2014

Android: Passing Messages between Activities

Intents are the messages which are passed between Activities, Broadcast Receivers, Services and Content Providers. So intent can be used to start a new Activity and to pass a message between activities. In our application first activity will pass some message to second activity, which will be simply retrieved and displayed by the second activity.

Output will be as:


Xml files: res---layout
activity_main.xml
 <LinearLayout xmlns:android="http://schemas.android.com/apk/res/android"  
   xmlns:tools="http://schemas.android.com/tools"  
   android:layout_width="match_parent"  
   android:layout_height="match_parent"  
   android:orientation="vertical"  
   android:padding="10dp"  
    >  
   <EditText   
     android:id="@+id/etmessage"  
     android:layout_width="fill_parent"  
     android:layout_height="wrap_content"  
     android:hint="Enter Message"  
     />  
   <Button   
     android:id="@+id/button1"  
     android:layout_width="wrap_content"  
     android:layout_height="wrap_content"  
     android:text="Send"  
     />  
   </LinearLayout>  

message.xml:
 <?xml version="1.0" encoding="utf-8"?>  
 <LinearLayout xmlns:android="http://schemas.android.com/apk/res/android"  
   android:layout_width="match_parent"  
   android:layout_height="match_parent"  
   android:orientation="vertical"   
   android:padding="10dp"  
   >  
   <TextView   
     android:id="@+id/tvMessage"  
     android:layout_width="wrap_content"  
     android:layout_height="wrap_content"  
     android:textSize="24dp"  
     android:textColor="#FF0000"  
     android:layout_gravity="center"  
     />  
 </LinearLayout>  

Java files:
MainActivity.java
 import android.os.Bundle;  
 import android.app.Activity;  
 import android.content.Intent;  
 import android.view.Menu;  
 import android.view.View;  
 import android.view.View.OnClickListener;  
 import android.widget.Button;  
 import android.widget.EditText;  
 public class MainActivity extends Activity implements OnClickListener {  
      EditText et;  
      Button b1;  
      @Override  
      protected void onCreate(Bundle savedInstanceState) {  
           super.onCreate(savedInstanceState);  
           setContentView(R.layout.activity_main); //referencing UI  
           et=(EditText) findViewById(R.id.etmessage);//referencing EditText  
           b1=(Button) findViewById(R.id.button1);//referencing Button  
           b1.setOnClickListener(this); //adding click event  
      }  
      @Override  
      public boolean onCreateOptionsMenu(Menu menu) {  
           // Inflate the menu; this adds items to the action bar if it is present.  
           getMenuInflater().inflate(R.menu.main, menu);  
           return true;  
      }  
      @Override  
      public void onClick(View v) {  
           // TODO Auto-generated method stub  
           switch(v.getId()){  
           case R.id.button1:  
                String message=et.getText().toString();  
                Intent i=new Intent(this,Message_class.class);//Intent used to start a new Activity  
                Bundle extras=new Bundle();  
                extras.putString("key", message);//binding data to bundle  
                i.putExtras(extras);//Adding extras(bundle) to intent  
                startActivity(i);//starting new Activity  
                finish();//finishing current activity  
                break;  
           }  
      }  
 }  
Here we have simply used Bundle that binds our data with Intent.
After adding bundle to an intent, startActivity() method is used to start a new Activity.

Message_class.java
 import android.app.Activity;  
 import android.os.Bundle;  
 import android.widget.TextView;  
 public class Message_class extends Activity {  
   TextView tv;  
      @Override  
      protected void onCreate(Bundle savedInstanceState) {  
           // TODO Auto-generated method stub  
           super.onCreate(savedInstanceState);  
           setContentView(R.layout.message);  
           tv=(TextView) findViewById(R.id.tvMessage);  
           Bundle extras=this.getIntent().getExtras();//retrieving bundle from intnet  
           if(extras!=null){  
                String msg=extras.getString("key");//retrieving message from bundle  
                tv.setText(msg);  
           }  
      }  
 }  

Manifest file:
 <?xml version="1.0" encoding="utf-8"?>  
 <manifest xmlns:android="http://schemas.android.com/apk/res/android"  
   package="com.example.message_example"  
   android:versionCode="1"  
   android:versionName="1.0" >  
   <uses-sdk  
     android:minSdkVersion="8"  
     android:targetSdkVersion="17" />  
   <application  
     android:allowBackup="true"  
     android:icon="@drawable/ic_launcher"  
     android:label="@string/app_name"  
     android:theme="@style/AppTheme" >  
     <activity  
       android:name="com.example.message_example.MainActivity"  
       android:label="@string/app_name" >  
       <intent-filter>  
         <action android:name="android.intent.action.MAIN" />  
         <category android:name="android.intent.category.LAUNCHER" />  
       </intent-filter>  
     </activity>  
     <activity  
       android:name=".Message_class"  
       android:label="New Activity"  
       ></activity>  
   </application>  
 </manifest>  
Here we have added our new activity i.e Message_class to our manifest file.
Feel free to ask me your doubts in the comments below.

Tuesday 4 March 2014

Android: Using ListView

In last tutorial we saw how to add click event to buttons and now in this tutorial we will see how to use a listview.

Output will be as:

XML file: res---layout
 <LinearLayout xmlns:android="http://schemas.android.com/apk/res/android"  
   xmlns:tools="http://schemas.android.com/tools"  
   android:layout_width="match_parent"  
   android:layout_height="match_parent"  
       android:orientation="vertical"  
  >  
 <EditText   
   android:id="@+id/etText"  
   android:layout_width="fill_parent"  
   android:layout_height="wrap_content"  
   android:hint="Enter text"  
   />  
 <Button   
   android:id="@+id/bAdd"  
   android:layout_width="wrap_content"  
   android:layout_height="wrap_content"  
      android:text="Add"    
   />  
 <ListView   
   android:id="@+id/listDisplay"  
   android:layout_width="fill_parent"  
   android:layout_height="wrap_content"  
   >  
 </ListView>  
 </LinearLayout>     

In our layout file we have added one EditText, Button and a ListView.
Clicking a button will take the user data and add it to a ListView.

Java file: src---your package name
 import java.util.ArrayList;  
 import android.os.Bundle;  
 import android.app.Activity;  
 import android.view.Menu;  
 import android.view.View;  
 import android.view.View.OnClickListener;  
 import android.widget.ArrayAdapter;  
 import android.widget.Button;  
 import android.widget.EditText;  
 import android.widget.ListView;  
 public class MainActivity extends Activity implements OnClickListener {  
      Button b1;  
      ListView list;  
      EditText et;  
      private ArrayAdapter<String> adapter;  
      private ArrayList<String> items;  
      @Override  
      protected void onCreate(Bundle savedInstanceState) {  
           super.onCreate(savedInstanceState);  
           setContentView(R.layout.activity_main);//referencing UI  
           b1=(Button) findViewById(R.id.bAdd); //referencing button  
           list=(ListView) findViewById(R.id.listDisplay); //referencing listview  
           et=(EditText) findViewById(R.id.etText); //referencing edittext  
           b1.setOnClickListener(this); //adding click event to button  
           items=new ArrayList<String>();  
           adapter=new ArrayAdapter<String>(this,android.R.layout.simple_list_item_1,items);  
           //Adapter used to bind array to the listview  
           list.setAdapter(adapter);//applying adapter to listview  
      }  
      @Override  
      public boolean onCreateOptionsMenu(Menu menu) {  
           // Inflate the menu; this adds items to the action bar if it is present.  
           getMenuInflater().inflate(R.menu.main, menu);  
           return true;  
      }  
      @Override  
      public void onClick(View v) {  
           // TODO Auto-generated method stub  
           switch(v.getId()){  
           case R.id.bAdd:  
                items.add(0, et.getText().toString());//getting data from edittext  
                adapter.notifyDataSetChanged();//refereshes the adapter (listview)  
                et.setText("");  
                break;  
           }  
      }  
 }  
Here we have used an ArrayAdapter which will bind the array(i.e ArrayList) to the ListView.
The onClick method does the job of retrieving user data from EditText and adding it to the ArrayList and the function notifyDataSetChanged() is used to refresh the adapter.

Manifest file:
 <?xml version="1.0" encoding="utf-8"?>  
 <manifest xmlns:android="http://schemas.android.com/apk/res/android"  
   package="com.example.listvieweg"  
   android:versionCode="1"  
   android:versionName="1.0" >  
   <uses-sdk  
     android:minSdkVersion="8"  
     android:targetSdkVersion="17" />  
   <application  
     android:allowBackup="true"  
     android:icon="@drawable/ic_launcher"  
     android:label="@string/app_name"  
     android:theme="@style/AppTheme" >  
     <activity  
       android:name="com.example.listvieweg.MainActivity"  
       android:label="@string/app_name" >  
       <intent-filter>  
         <action android:name="android.intent.action.MAIN" />  
         <category android:name="android.intent.category.LAUNCHER" />  
       </intent-filter>  
     </activity>  
   </application>  
 </manifest>  
No need to make any changes in a Manifest file.

Test your application and if you have any doubts feel free to ask me in the comments below.

Saturday 1 March 2014

Android: Using Buttons with Click Events

In this tutorial we will create two buttons and on pressing one of the button, TextView displays the text as which button is pressed.

Output will be as:


Xml file: res---layout
 <LinearLayout xmlns:android="http://schemas.android.com/apk/res/android"  
   xmlns:tools="http://schemas.android.com/tools"  
   android:layout_width="match_parent"  
   android:layout_height="match_parent"  
   android:orientation="vertical" >  
  <Button   
    android:id="@+id/button1"  
    android:layout_width="wrap_content"  
    android:layout_height="wrap_content"  
    android:text="Button 1"  
    />  
  <Button   
    android:id="@+id/button2"  
    android:layout_width="wrap_content"  
    android:layout_height="wrap_content"  
    android:text="Button 2"  
    />  
  <TextView   
    android:id="@+id/textview1"  
    android:layout_width="wrap_content"  
    android:layout_height="wrap_content"  
    android:text=""  
    />  
 </LinearLayout>  

First, Layouts are used to define how your views(i.e Buttons, TextViews, etc) will be positioned on the screen. For these, different layouts are used such as LinearLayout, RelativeLayout, GridLayout, etc.
Here we are using LinearLayout, in LinearLayout views can be either placed in vertical or horizontal format.
So android:orientation="vertical" under LinearLayout defines that the views will be placed vertically.
Next we have used Buttons and TextView, for any view id,width and height are the basic attributes.
Id of the view is further used in java file as a reference to the view defined in xml.
Width and Height defines the width and height of a view.Either you can put width and height in dp for e.g android:width="20dp" or you can use wrap_content,fill_parent or match_parent. fill_parent and match_parent does almost same thing that it will fit the screen and wrap_content means that it will be wrapped in minimum possible space.

Java file: src---your package name
 import android.os.Bundle;  
 import android.app.Activity;  
 import android.view.Menu;  
 import android.view.View;  
 import android.view.View.OnClickListener;  
 import android.widget.Button;  
 import android.widget.TextView;  
 public class MainActivity extends Activity implements OnClickListener {  
      Button b1,b2;  
      TextView tv1;  
      @Override  
      protected void onCreate(Bundle savedInstanceState) {  
           super.onCreate(savedInstanceState);  
           setContentView(R.layout.activity_main);  
           b1=(Button) findViewById(R.id.button1);//referencing button defined in xml file  
           b2=(Button) findViewById(R.id.button2);  
           tv1=(TextView) findViewById(R.id.textview1);//referencing textview  
           b1.setOnClickListener(this); //setting on click event on button  
           b2.setOnClickListener(this);  
      }  
      @Override  
      public boolean onCreateOptionsMenu(Menu menu) {  
           // Inflate the menu; this adds items to the action bar if it is present.  
           getMenuInflater().inflate(R.menu.main, menu);  
           return true;  
      }  
      @Override  
      public void onClick(View v) {  
           // TODO Auto-generated method stub  
           switch(v.getId()){//v.getId() for getting id of the pressed button  
           case R.id.button1:  
                //button1 pressed  
                tv1.setText("Button 1 pressed");//set text of textview  
                break;  
           case R.id.button2:  
                tv1.setText("Button 2 pressed");  
                break;  
           }  
      }  
 }  
A java file placed under src---your package name must extend an Activity.
Here as we have to implement click event so we will have to implement OnClickListener and then in onClick method we can add the functionality that will be performed on a click event.

Manifest file: (AndroidManifest.xml)
 <?xml version="1.0" encoding="utf-8"?>  
 <manifest xmlns:android="http://schemas.android.com/apk/res/android"  
   package="com.example.example"  
   android:versionCode="1"  
   android:versionName="1.0" >  
   <uses-sdk  
     android:minSdkVersion="8"  
     android:targetSdkVersion="17" />  
   <application  
     android:allowBackup="true"  
     android:icon="@drawable/ic_launcher"  
     android:label="@string/app_name"  
     android:theme="@style/AppTheme" >  
     <activity  
       android:name="com.example.example.MainActivity"  
       android:label="@string/app_name" >  
       <intent-filter>  
         <action android:name="android.intent.action.MAIN" />  
         <category android:name="android.intent.category.LAUNCHER" />  
       </intent-filter>  
     </activity>  
   </application>  
 </manifest>  

Whenever a new Activity is created it should be declared in a manifest file.
An Activity should include a name and intent filters,intent filters are basically used to define the role of activity as in our case when our application is launched so the activity that needs to be displayed first should be mentioned as a launcher activity for e.g android:name="android.intent.category.LAUNCHER" under the category.Also the action names can be used to navigate between different activities which we will see in our further tutorials.

So that's it we have created an application having buttons with click events. If you have any doubts feel free to ask me in the comments below.

Running Android Application

In this tutorial we will see how to run an android application.

So for that we have two methods:
  1.   Either we can run on Android Virtual Device(AVD).
  2. Or we can run our application on an actual android device.
Running on Android Virtual Device(AVD)

Before running an android application on a virtual device we have to create one.

Steps for creating Android Virtual Device:
  1. Go to Windows->Android Virtual Device Manager.
  2. Click on New
  3. Add details for Android Virtual Device.
  4. Click OK

Now after creating a virtual device just start it from Android Virtual Device Manager and when you will run your application, eclipse will automatically install the application on your virtual device.

Running on Actual Android Device.
  1. Go to Settings in your phone.
  2. Locate Development and tick USB Debugging.
  3. Connect your phone through USB.
  4. Click Run from Eclipse.
  5. Select appropriate device from Android Device Chooser and click OK.
  
Eclipse will then automatically install the application in your device.